
I’m finally getting around to part 2 of my article Controlling how flag notes are attached to leaders. Sorry for the long delay. There’s been a lot going on IRL. Also, for a very brief .001 second, I thought it might be funny to just do a bunch of part 1’s and never get around to doing part 2’s or 3’s. Unfortunately, that would only be funny to me, so it wouldn’t really be funny at all.
Add flag notes to drawings using annotation borders
In addition to flag note symbols mentioned in part 1 of this article, another way to create flag notes is with the use of annotation borders. Depending on the results you want, there’s two ways to add borders. The method is the same, but selection choices make for slightly different results.
1. Create an annotation note with a leader.

2. Type in the number of the flag note.

3. While still editing the annotation, highlight the number (either using SHIFT and LEFT ARROW or by selecting with the mouse)

4. While remaining in the edit mode (with the text highlighted), click on the Border drop down box in the PropertyManager. Choose the required shape.


5. Choose OK and this will be your result. Note the gap between the leader shoulder and the flag note (image below). This is similar to the result when using a flag note symbol from the Symbol Library. For triangles, this border method produces an equilateral triangle, where the Symbol Library is an isosceles triangle.

Flag note with touching leader (no gap)
Some people may prefer a flag note that touches the shoulder of the leader. This is my personal preference too. It follows the same look and feel as balloons and other symbols. To achieve this style, follow steps 1 and 2 above, then continue with these steps below.
3. Exit the edit mode. You should see a leader with just a number.

4. Select the leader note as one entity (LMB click anywhere on the leader note; shoulder, arrow, text, doesn’t matter).

5. With the note selected, click on the Border drop down box in the PropertyManager. Choose the required shape.
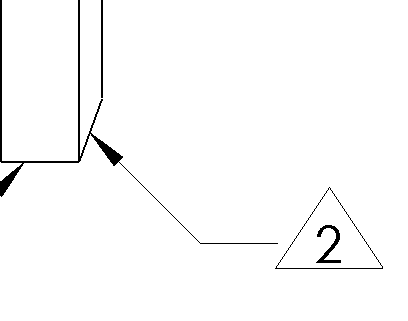
6. Choose OK and this will be your result. Note the leader shoulder connects with the flag note (no gap).

I hope this How-to (or is this a Tips and Tricks?) helps!